How Do You Weave a Paracord Survival Bracelet?
**How Do You Weave a Paracord Survival Bracelet?**
Crafting your own paracord survival bracelet can be a fun and rewarding experience, not to mention the practicality of having a piece of survival gear always at hand. Paracord, also known as parachute cord or 550 cord, is a versatile and durable material that can be used in various emergency situations. In this article, we will guide you through the process of weaving your very own paracord survival bracelet.
**Selecting the Right Paracord**
Before you begin weaving your paracord survival bracelet, you need to ensure you have the right type of paracord. The most commonly used paracord for crafting bracelets is the 550 paracord, which is strong and versatile. You can choose from a variety of colors to personalize your bracelet.
**Measuring and Cutting the Paracord**
To start weaving your paracord survival bracelet, you will need to measure and cut the paracord to the desired length. A typical length for a bracelet is around 7-8 feet of paracord, depending on your wrist size and the type of weave you plan to use. It’s always better to have more paracord than you think you will need, as it’s easier to trim off excess cord than to add more in the middle of your project.
**Creating the Core of the Bracelet**
To create the core of your paracord survival bracelet, fold the length of paracord in half, creating a loop at one end. This loop will serve as the base of the bracelet, so make sure it is secure. You can use a buckle or a knot to secure the loop in place before you start weaving the bracelet.
**Weaving the Bracelet**
There are various weaving patterns you can use to create your paracord survival bracelet, but one of the most common and simple ones is the cobra weave. To start the cobra weave, take one side of the paracord and place it over the core strands, crossing it in the middle. Then, take the other side of the paracord and place it over the first side, then behind the core strands and up through the loop created by the first side. Pull both sides tight to create the first knot. Repeat this process, alternating sides each time, until you reach the desired length for your bracelet.
**Finishing the Bracelet**
Once you have woven the paracord to the desired length, it’s time to finish off the bracelet. Trim any excess paracord, leaving a small tail of about an inch. You can melt the ends of the paracord with a lighter to prevent fraying and secure the knots in place. You can also add a buckle for easy fastening and adjustment of the bracelet.
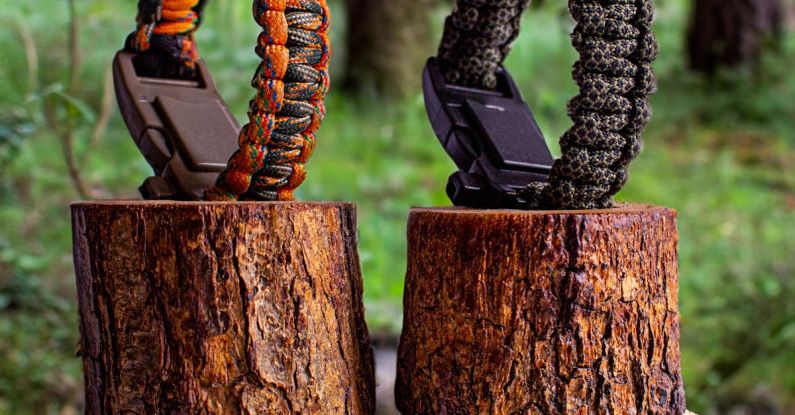
**Benefits of a Paracord Survival Bracelet**
A paracord survival bracelet is not only a stylish accessory but also a practical tool to have in emergency situations. In a survival scenario, you can unravel the bracelet to have several feet of paracord at your disposal for building shelters, making traps, repairing gear, and many other uses. It’s a compact and lightweight piece of gear that can make a difference in a challenging situation.
**In Conclusion**
Weaving a paracord survival bracelet is a simple and enjoyable craft that can result in a useful and stylish accessory. By following the steps outlined in this article, you can create your own personalized paracord bracelet that can serve as a valuable tool in emergency situations. So, gather your materials, get creative with colors and patterns, and start weaving your paracord survival bracelet today!